
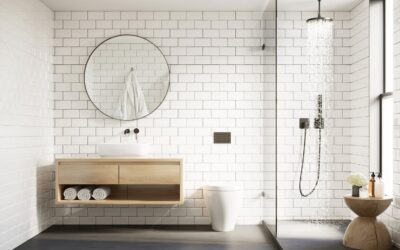
When we think of remodeling and renovation projects, it’s often on a grand scale. A whole home makeover could add value to your home and have you falling in love with your living spaces all over again. But there are times when just a small touchup is needed, or, maybe you simply want a new color theme to change the mood. Paint is an extremely simple and cost-effective way to update a room. Painting is a home renovation project that is often suited to DIY.
If you’re debating whether to call a Des Moines handyman or start the job alone, this is the guide for you. We’ll explore what goes into painting a room, the tools that are needed, and the steps to get fantastic results. DIY isn’t for everyone, and with the right information, you’ll be able to decide the best way to move forward with a minor home makeover.
The Basic Steps of Painting a Room During Minor Home Renovation
In DIY, people often approach jobs in a way that seems most logical to them. Painting isn’t the best project for improvisation. You will want to have a structured approach, no matter the space you are working in.
The actual process can be broken down into a few unique steps, which should be carried out in the following order:
- Removing furniture and other items from the room.
- Prepping walls and performing minor repairs.
- Taping off trim like baseboards and molding.
- Painting the walls.
These steps will get you through the most basic makeover in a living room, bedroom, dining room etc. Each step is important and will involve a few sub steps. We’ll dive into details in the following sections, helping you to decide whether you should call Des Moines contractors or get the job done yourself.
Removing Furniture Before Home Renovation Painting
This is the easiest step. It’s also one of the most important. Removing all items from the room will give you more space to work in. If you are in a larger room like a living room, you can move furniture and other items to the center of the room, before covering everything with a heavy duty drop cloth.
Relocating furniture to another room is recommended but it all depends on your situation. If you have a spare bedroom or garage space, then temporarily storing your items won’t be a big deal. If you have a smaller home without a lot of free space, then centering and covering your items will make sense.
During this step you need to ensure that there’s absolutely nothing left on your walls. Nails, picture hangers etc. should all be removed prior to preparation and repairs. This will allow you to get the most consistent finish across the whole wall, and it will help if you ever choose to sell in the future. A room with a perfectly painted wall will look much better than one with odd patches and hangers sticking out.
Don’t forget about curtains and blinds during this step. The room should be bare, sparing minor features like outlet and switch covers. If you have large decorative shades around ceiling lights, these should also be removed during painting.
When the room is emptied or all items are covered, you can move on to your preparation.
Prepping Walls and Performing Minor Repairs
Prepping is all about getting a smooth surface so that the paint adheres well without visible imperfections once the job is done.
If there are holes left from nails and hangers that you won’t be reusing, you will need to fill these ahead of painting. You can purchase spackling paste from your local hardware store. Filling in holes is as simple as applying a small amount of paste, smoothing it with a spatula, and allowing it to dry. This can take up to 24 hours. You can check the spackle with a light finger touch. If it’s hard and there is no fingerprint left behind, you’re ready to start sanding.
The easiest way to do this is with a sanding sponge or 120 grit sandpaper. Most DIY enthusiasts prefer a sponge because it allows for a consistent finish, even without prior experience. Sand the outside of the treated area until the spackle is smooth with the wall, and then lightly sand over the center of the spackle until you can run your fingers smoothly along the surface.
Wipe around the area with a damp cloth or sponge to remove any dust leftover, and then allow the area to dry again. Once the area is completely dry, use a brush to apply a light coat of primer. If you don’t prime the spackle, you will end up with an irregular coat once you start painting the rest of the wall.
You can follow these instructions for holes left from screws, nails, and decorative hangers. Even larger holes from mounted shelves and other features can be repaired with spackling paste.
When the walls are fully repaired and sanding is completed, you can start to clean the surfaces. This will remove any gloss from existing paint, as well as imperfections like dust and dirt. A clean cloth or squeegee can be used with a household paint prep cleaner. There are plenty of options on the market, this Chomp cleaner is one of them. Visit your local hardware store and talk to the staff if you’re unsure about what to use. Clean all surfaces and allow time for drying, following the manufacturer’s instructions.
For many people who complete DIY painting, preparation will be the hardest part of the job. If you aren’t confident filling holes and sanding off your repairs, a Des Moines handyman or home renovation company will be your best bet. Try starting small on a minor repair and see how you go. If you aren’t happy with the result, you can always call in the professionals.
Taping Off Your Trim for Home Renovation Painting
If you perform a thorough prep, it could take a full day (with drying time allowed). On the second day you will be able to move on to taping and painting.
Taping is especially important because it will allow you to achieve a professional finish. It will also keep your colored paint off molding and baseboards. Don’t rush this step, or you could be disappointed in the results!
Multi-surface painter’s tape will be your best bet. There are countless brands on the market, although it’s always safest to go with a trusted name brand like 3M Scotch or FrogTape.
- Tape off baseboards and molding completely, especially if you have never painted before. If you have hardwood or solid floors, extend the tape down to the flooring surface. It’s best to be completely safe when performing DIY home renovation.
- Run your finger along the edge of the tape smoothly and with moderate force to ensure that painted edges are crisp.
- Cover the rest of your flooring with a canvas drop cloth (for carpet) or rosin paper (for solid flooring). This will eliminate any paint splashes.
- Tape off light switch covers and outlet covers, as well as any mounted accessories like smart devices or thermostat controllers.
DIY Painting Your walls
Next comes the most critical and rewarding part of the project. It’s time to paint!
You’ll need to make sure that you’re covered with all the accessories for painting. You can purchase the following from a hardware store or big box home improvement store.
- Paint – Color is completely up to you. Eggshell paint is a good option for modern homes. It features a semi-matte finish that still provides some luster in the right lighting. Be sure to consider how color will complement your home décor and overall theme.
- Paint Stirring Stick – You can pick up a stirring stick for free when buying paint at most home improvement and hardware stores. You need to ensure that paint is well mixed before you pour it into your tray and get to work. Up to 30 seconds of stirring is enough for most home renovation If in doubt, follow the manufacturer instructions on the can.
- Paint Tray – A metal or plastic paint tray will do. If you plan to paint again in the future, a metal tray will be more durable. You can also use a tray liner to make cleanup easier.
- Brushes – 3” and 4” flat edge brushes are best for wall painting. Aim for mid-range quality. Wooster, Presa, and Purdy are some well-known brands suitable for DIY.
- Roller Brushes (Covers) and a Roller – Invest in an adjustable telescoping paint roller so that you can easily reach the tops of your walls. A small room could be painted with a single roller brush, but for living areas, it’s best to invest in a kit of roller brushes (at least three). Stanley, Purdy, and Wooster rollers are good choices.
Now comes the painting itself. Most DIY painters will start with brushwork in the corners and around the edges of molding, baseboards, switches, and outlets etc. It helps to have two people working simultaneously, one with the brush, and another with the roller.
The idea is to make smooth and consistent passes and reapply paint to the roller when the coat starts to become thin. Rollers help a lot with spread and consistency, so even if you aren’t a pro, you’ll still get impressive results. If you’re painting a darker color on a lighter wall it will be easy to see exactly which sections are finished.
Here are some simple tips to get the job done:
- Roll in long vertical strips to distribute paint evenly across the wall. After the initial coat, go back with a second layer (while the paint is still wet) to ensure a uniform finish.
- Work from edge to edge and don’t leave isolated patches. This could cause you to go back over covered areas, leaving an uneven finish.
- Don’t dip the roller completely into the paint tray, this will cause drips and gobs down your wall which you will then need to go back over.
- If you have a spare piece of drywall from an older home renovation, consider practicing on it first. Prime it and then use the roller to paint long, even strips.
- Work carefully but not so slowly that you will be rolling back over semi-dry and sticky paint.
You can follow these steps and even watch some online tutorials to get an idea of the work involved in painting. While one of the simpler home renovation projects, this can still be quite challenging for first time DIYers.
If you’re not confident at any point of the process, or if you simply don’t have the time, a Des Moines contractor will be able to help.
The Advantages of Working with Des Moines Home Renovation Experts
At HomeWorx Iowa, we’ve seen great results from DIY painting. We’ve also been called in to remedy homes where painting didn’t go according to plan.
Ultimately, deciding on whether you perform DIY painting will depend on your confidence and the time that you have.
- Do you have the time to get all the tools, paint, and accessories?
- Do you have a weekend to set aside for painting?
- Are you confident that you can remain focused throughout the home renovation project?
If you can’t answer yes to all these questions, then a professional home renovation will be the best option for you.
We offer cost-competitive renovation and handyman services for the smaller projects around your home. We can also perform complete home renovation work, so if you have a bigger project in mind, we can offer a free consultation so that you can make the right decision.
Whether it’s DIY or with a Des Moines handyman, you can refinish your living spaces to be brighter, more inviting, and more modern. If you aren’t ready to take on the job of painting and other home improvements, talk to your local professionals at HomeWorx.
0 Comments